Deployment guide
This article provides a comprehensive guide on deploying your project when using the Finder template. There are multiple ways to deploy, whether manually uploading to a server or utilizing modern cloud platforms with integrated CI/CD.
Manually uploading to a server
The build system in Finder includes a streamlined command designed to prepare your project for production. The npm run build command performs several critical tasks:
- Builds and minifies: Compiles CSS and JavaScript, ensuring they are optimized for quick loading times.
- Generates icon font: Converts SVG icons into a web-friendly icon font.
-
Copies vendor files: Transfers necessary third-party libraries and frameworks from the
node_modulesdirectory to theassets/vendorfolder. - Validates HTML: Checks the HTML files against W3C standards to ensure they are compliant and error-free.
-
Creates a distribution folder: Generates a
distfolder where all production-ready files are stored. This includes HTML files with updated links to the correct vendor files.
Uploading to a server
Once the build process is complete, you can upload the contents of the dist folder to your hosting server using FTP, SFTP, or any other file transfer method you prefer. This step involves transferring your optimized files to a web server where they will be accessible to users.
Deploying with cloud platforms (Vercel)
For those preferring a more automated approach, using a cloud platform like Vercel offers a straightforward deployment process with benefits such as Continuous Integration and Deployment (CI/CD). Here's how you can set up your project with Vercel:
- Connect your repository: Link your GitHub, GitLab, or Bitbucket repository to Vercel. This allows Vercel to access your project files.
-
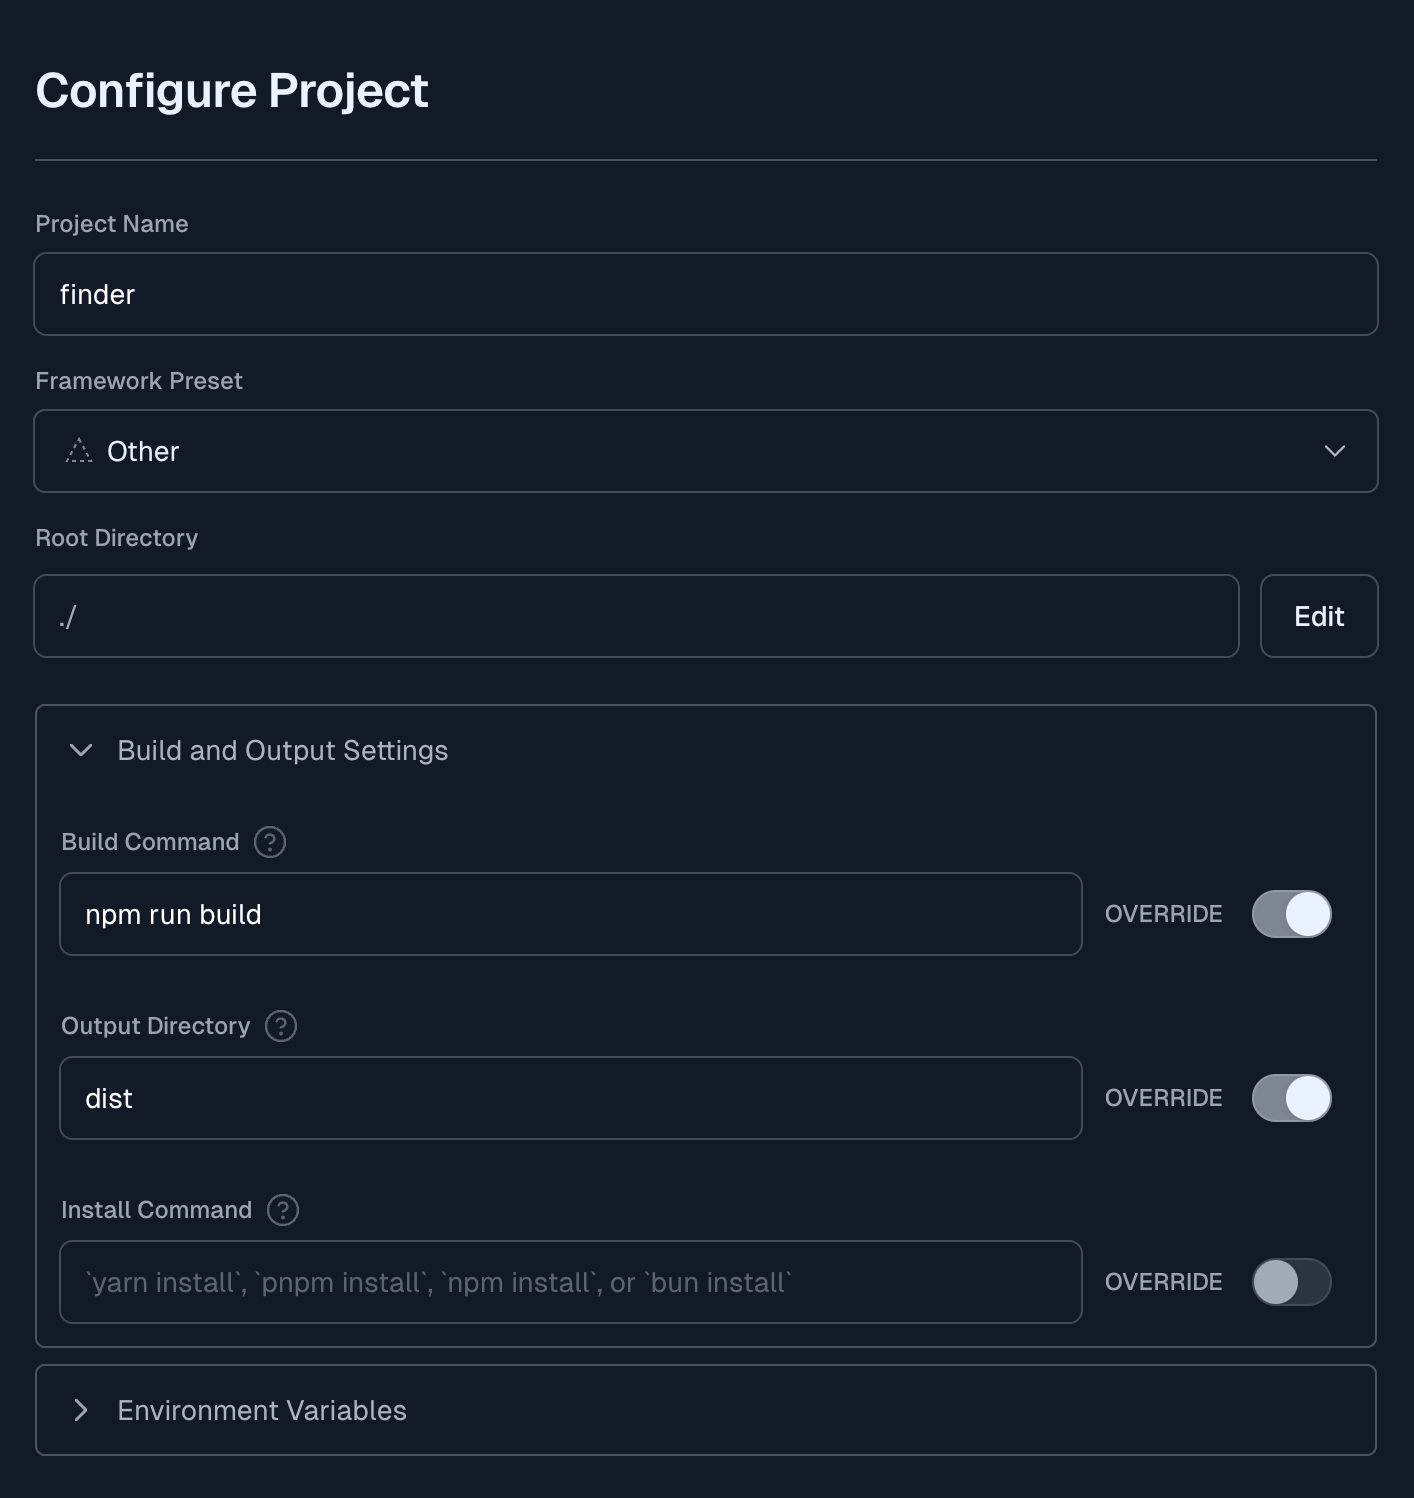
Configure the build settings: Set up the build commands and output directory in Vercel. Typically, this would involve specifying
npm run buildas your build command anddistas your output directory. - Deploy: Once configured, each push to your repository will trigger a new deployment automatically. Vercel handles all the aspects of serving your website, from CDN distribution to SSL certificate management.
Below is an example screenshot showing the proper configuration for a Vercel project:
